Why Install?
Rainman built our reputation on inventing and commercialising portable watermakers. However, over the years many of our customers prefer to permanently or semi-permanently install their systems into their boat. There are many reasons for this:
- You don’t have to pull the system out on deck every time you use it.
- No hoses thrown over the side of your boat while system is in use.
- Less concern of hoses getting kicked out of place while in use.
- Easier to use while underway.


System Types Available
If you decide to install a Rainman watermaker, you can choose from any of our electric systems. We do not recommend you install our petrol (gasoline) powered watermaker. Options include:
AC powered
The primary design principle in the AC Rainman is that it must start and run using a Honda 2kVA portable generator. The ubiquity of this generator has helped make it the most popular system in our range. It can also run on a good quality 2kVA inverter. Higher capacity generators and inverters are commonly used as well.
12VDC powered
This system was designed with lower power and lower flow rates. Simplicity and low maintenance is retained by utilising a simple triplex plunger pump.
Two Components – One Watermaker
The system is made up of a pressure supply unit (PSU) and a reverse osmosis unit (RO). Both parts are required to make a complete watermaker. The PSU lifts the seawater, filters out the sediment and puts the system under high pressure, while the RO unit extracts fresh water from the stream of pressurised seawater. Most of the water goes out to waste as brine output, while about 20% of the volume is extracted as fresh potable water for your tanks. Different RO options exist for you to select with your AC Rainman system, each to achieve their own specific objective.

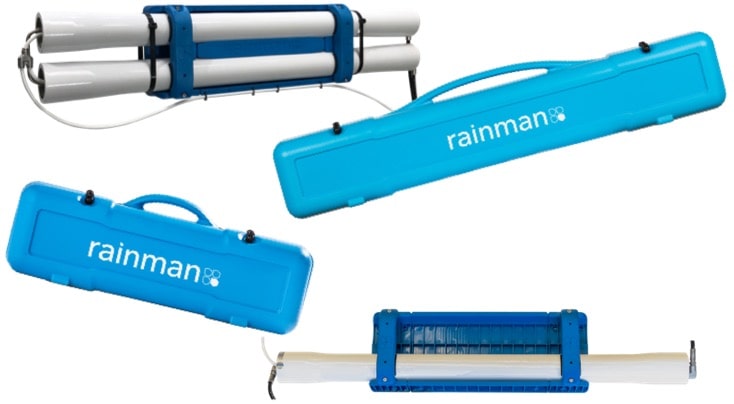
Case or Naked
The system can be purchased either as the traditional blue case version or in the Naked configuration. Both can be easily installed in your boat. The pricing, performance and power consumption are identical between the two options, so your specific requirements control which is best suited for your application. The main differences between the two systems are:
- Naked comes without the blue cases, but includes most of the valves and plumbing components for your installation.
- The valve / gauge control on the reverse osmosis (RO) unit is at the end of a high pressure hose, so the membranes can be installed “out of sight and out of mind”.
Full details on the differences between the case and naked systems can be found on the pages dedicated to our AC watermakers or our 12VDC watermakers.
Types of Installation
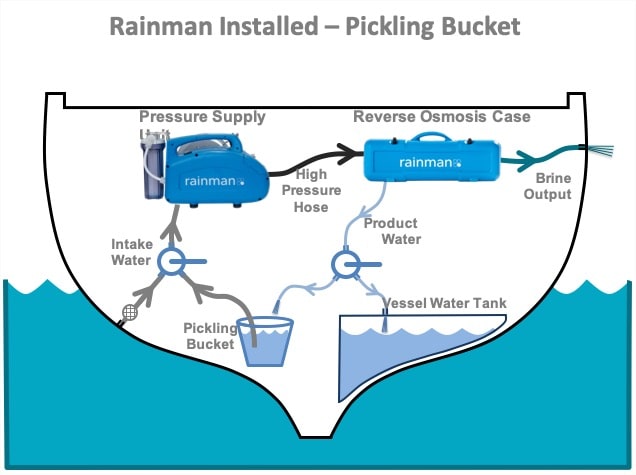
Both the case and naked systems can be installed and plumbed in various configurations. Below are high level schematics of four possibilities (click on image for larger view). The core components of the installation are:
- Dedicated or shared through hull for intake of seawater.
- Ability to draw water out of a bucket for flushing or pickling the watermaker. Using our autoflush option means you will rarely, if ever, need the pickling bucket.
- Control product water flow for testing or filling your tank.
- Brine waste water goes overboard.


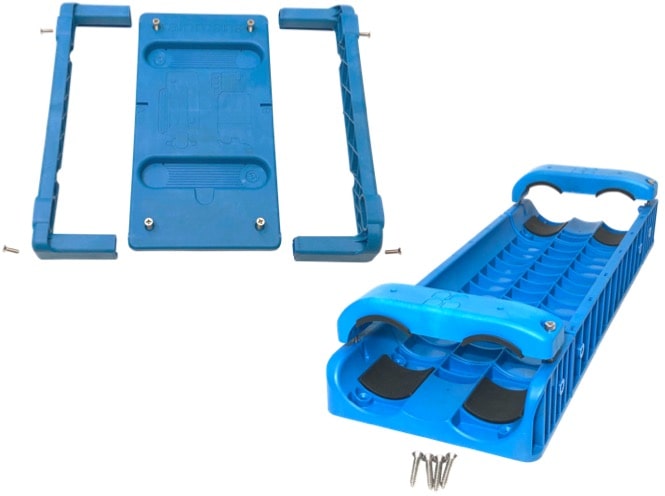
Easy Mounting System
Often one of the challenges with a watermaker is the physical installation of the system. Rainman has developed a mounting system made of fibreglass reinforced nylon to make this process as easy as possible. Simply screw down the seats with self-tapper screws and the Rainman systems snap into place.
More details can be found in the installation guide, but watermaker installers tell us they can save hours off of each installation.
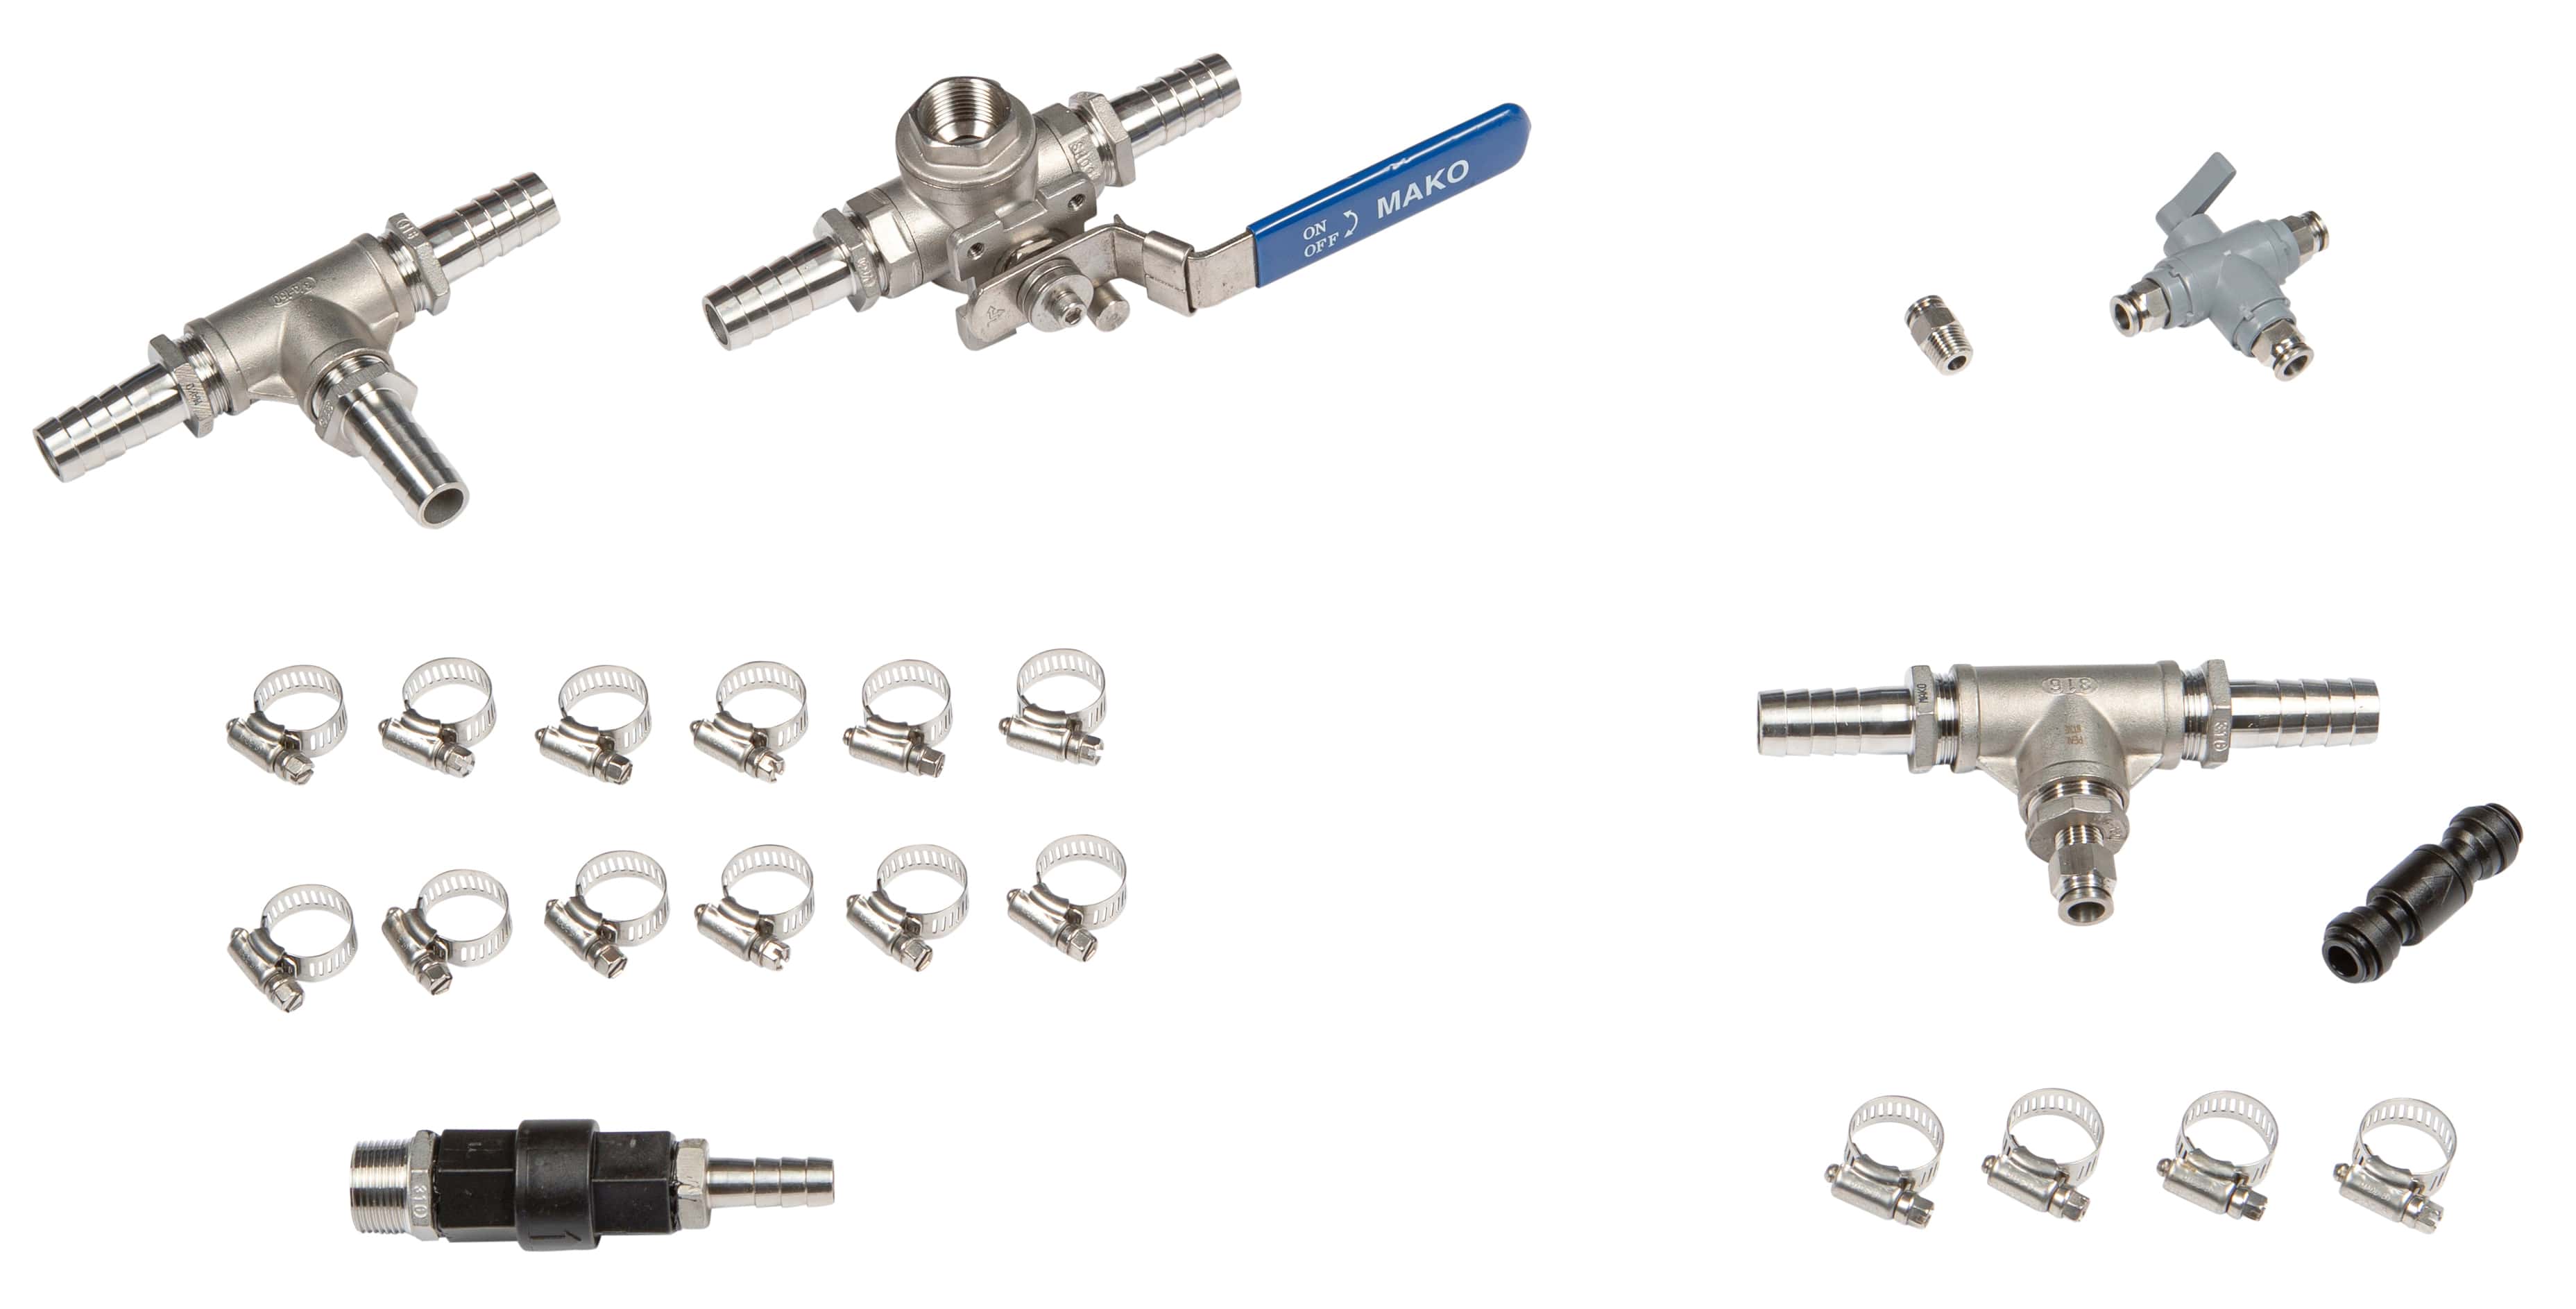
Plumbing Installation Kit
The Rainman Naked watermaker includes a plumbing kit that is designed to fulfil most of your requirements for your installation. Obviously, every boat is different, so there will be some parts you may need to source yourself. Some of these parts can include a sea strainer, extra 3/4″ hose, and related fittings.
If you plan to fully install your Cased Rainman system, the plumbing kit can be purchased as an option.
More details of what is included in this kit can be found on the accessories page.
Technical Requirements for Installation
While most customers that install their system may have it done professionally, there is no reason you can not tackle the job yourself. The skills required include the use of hand and power tools, cutting in to various water lines, and routing soft plumbing and cabling throughout your vessel.
The installation guide will assist in determining if you wish to do the job yourself.

Control Panel
The optional control panel provides a remote management capability for your installed Rainman watermaker. It’s a highly presentable and functional add-on component that will enhance your Rainman user experience.
It is an injection moulded ASA acrylic panel that remains true to Rainman’s reputation of elegant simplicity.
- Integration with the Rainman autoflush system, triggers flush cycle after powering the watermaker off.
- Built in tri-colour LED salinity sensor indicates when water is good to route to your tank.
- Can be installed flush mounted, standalone with the included enclosure box, or even externally with the optional hatch.
- Simple installation with no high pressure fittings or high voltage wiring.
- Backwards compatible if you already have an installed electric naked or cased Rainman.
Autoflush
Your Rainman watermaker is a very robust piece of equipment, but caring for certain aspects will prolong its life. Regularly flushing your Rainman with fresh water will maximise the life of your watermaker membranes.
The optional autoflush system incorporates a solid state programmable timer that will flush your Rainman watermaker after each use and every seven days thereafter. It incorporates built in protection if your boat loses power during or between flush cycles.

Maintenance Requirements
While there is limited maintenance on your Rainman watermaker, there are a few things that should be looked after to ensure a long life of your system.
When storing system:
- Fresh water flush and pickle the system when storing it for more than a couple days. This may sound complex, but it is an easy five minute process with no specialist knowledge required. Alternatively, install the autoflush system to avoid the need for manually performing this task.
5-50+ hours of use:
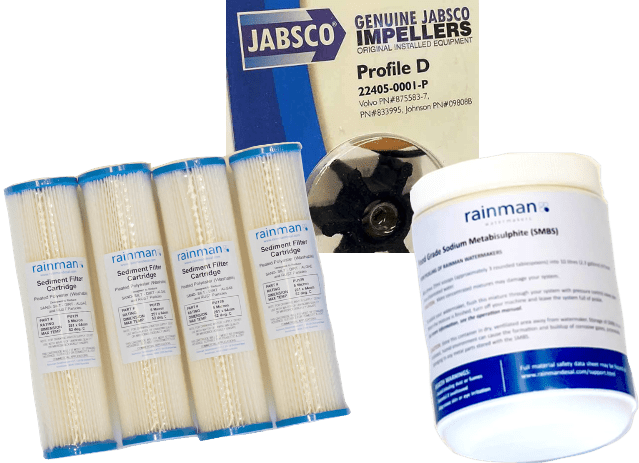
- Change the non-proprietary prefilter after 5-50+ hours of us, depending on cleanliness of the source water.
1-2 years:
- Change non-proprietary impeller in the lift pump after a year or two, depending on use.
- Change the high pressure pump oil each 300 hours of use, using SAE-30 weight oil.
5-10 years:
- Change the non-proprietary sized reverse osmosis membranes after 5-10 years.
- If your system starts losing performance, the non-proprietary pump seals may eventually require replacing.
Spares and Consumables
Your new Rainman system will arrive with enough spares and consumables to keep you going for a while, so most customers do not need to order more with initial purchase. There are a variety of items you will need over time to keep your system running for many years.